Automatic signing configuration
Creation Date: March 17, 2025
Updated by: VNPT eContract's team
This feature allows users to set up automatic signing configuration for VNPT SmartCA digital certificates for enterprises. When the configuration is enabled, the system will automatically sign all documents of the specified type without manual intervention. This feature is very useful for businesses that need to process a large volume of similar documents quickly and efficiently, such as in batch transactions or continuous document processing.
Instructions for enabling automatic signing configuration
-
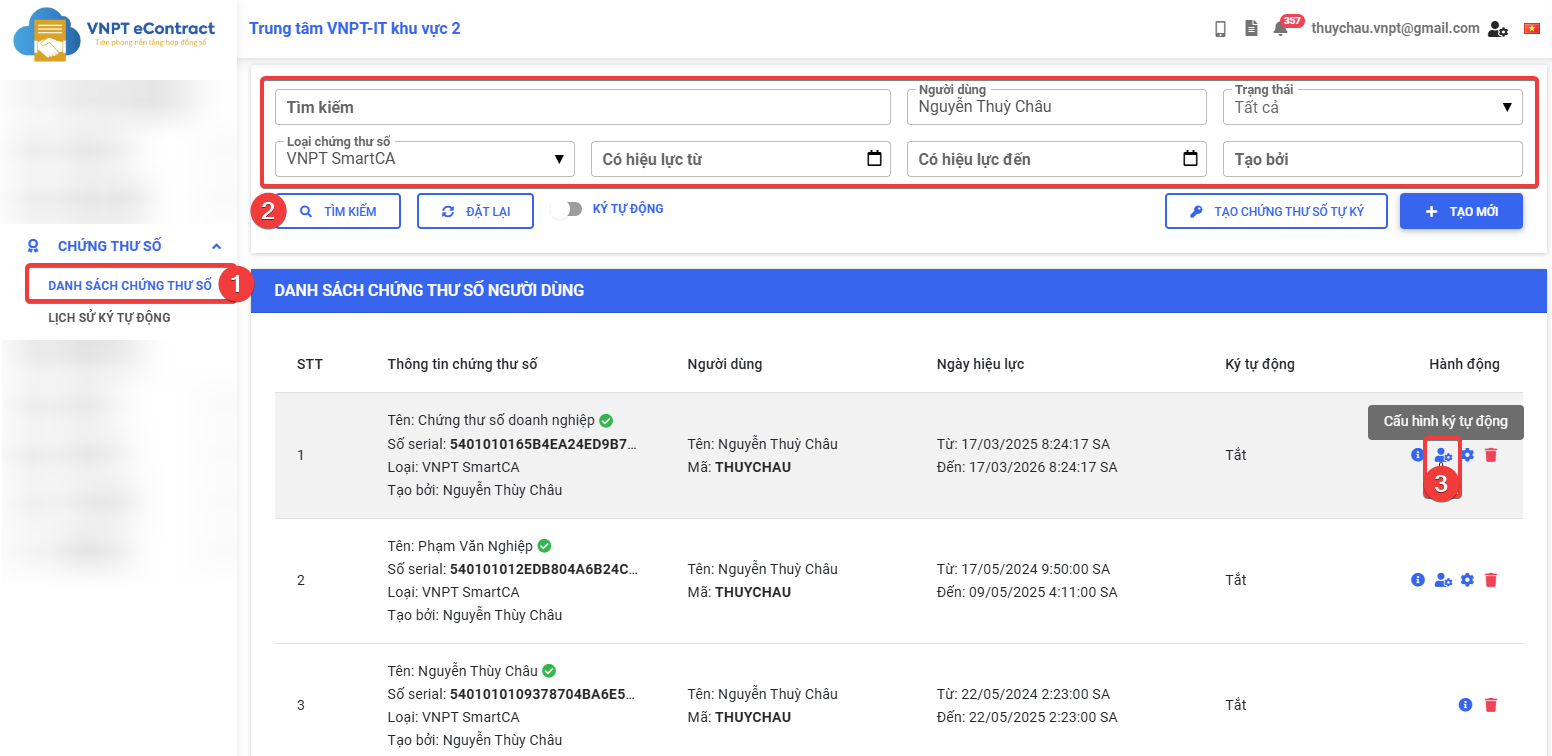
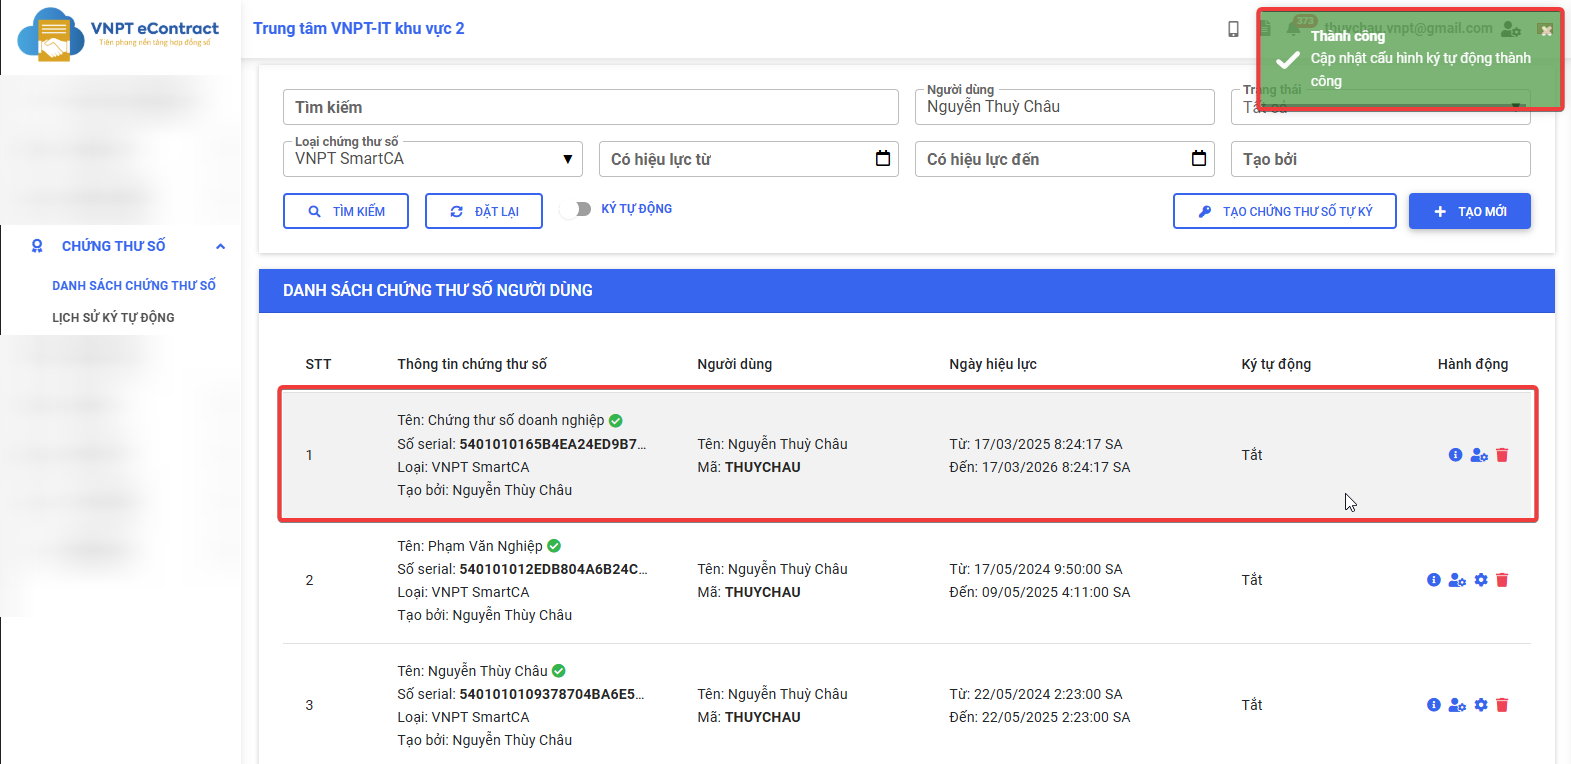
Step 1: Access the User certificate list screen.
-
Step 2: Select the VNPT SmartCA digital certificate (business account) for which you want to enable automatic signing configuration and the specific user.
-
Step 3: Click “Enable automatic signing”.
-
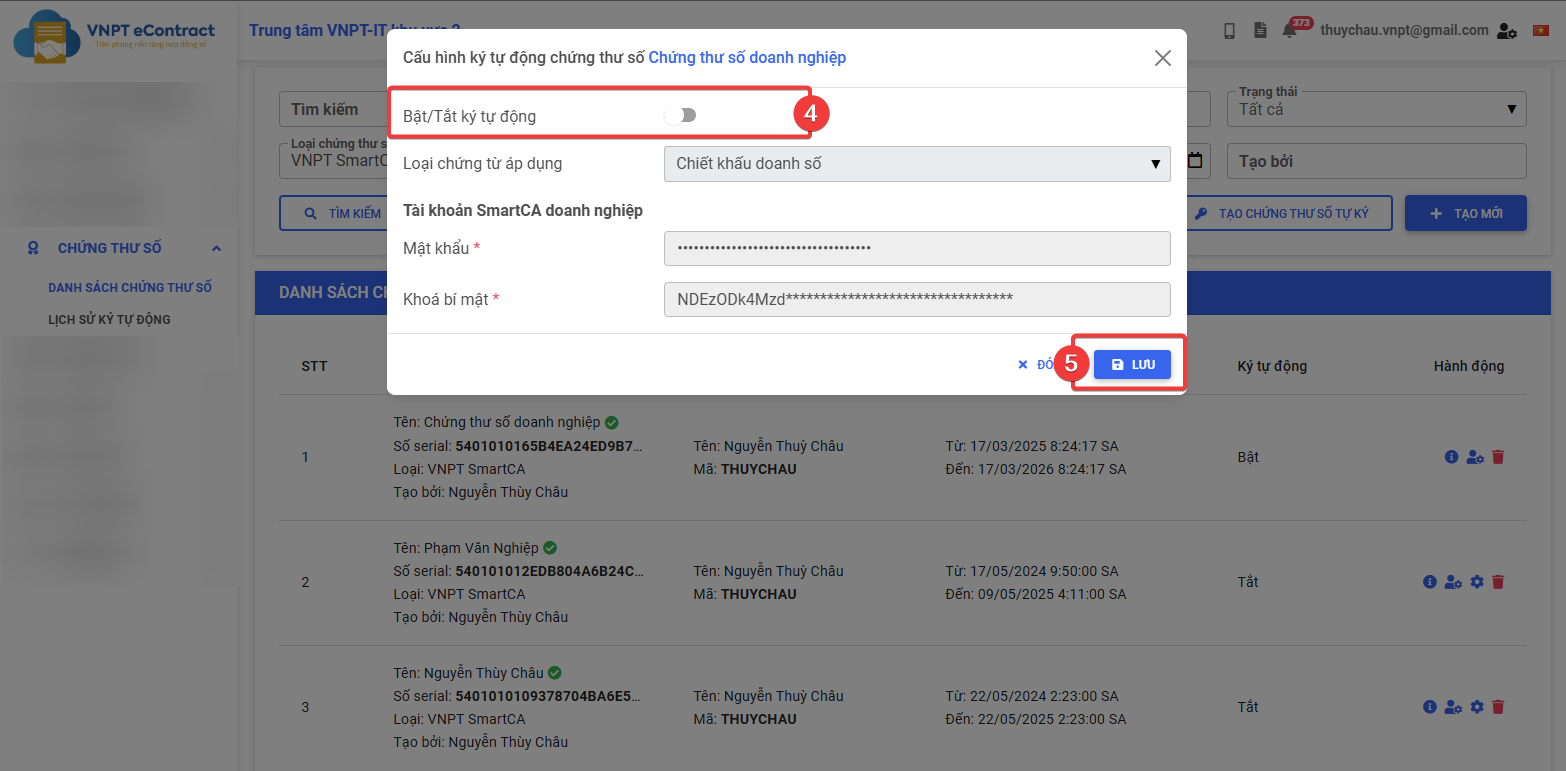
Step 4: The automatic signing configuration window appears:
- Enable/Disable auto sign: Click to enable (change to blue).
- Applicable document type: Select one or more types of documents to apply the automatic signing feature (required).
- Password, Secret key of the VNPT SmartCA digital certificate (required).
-
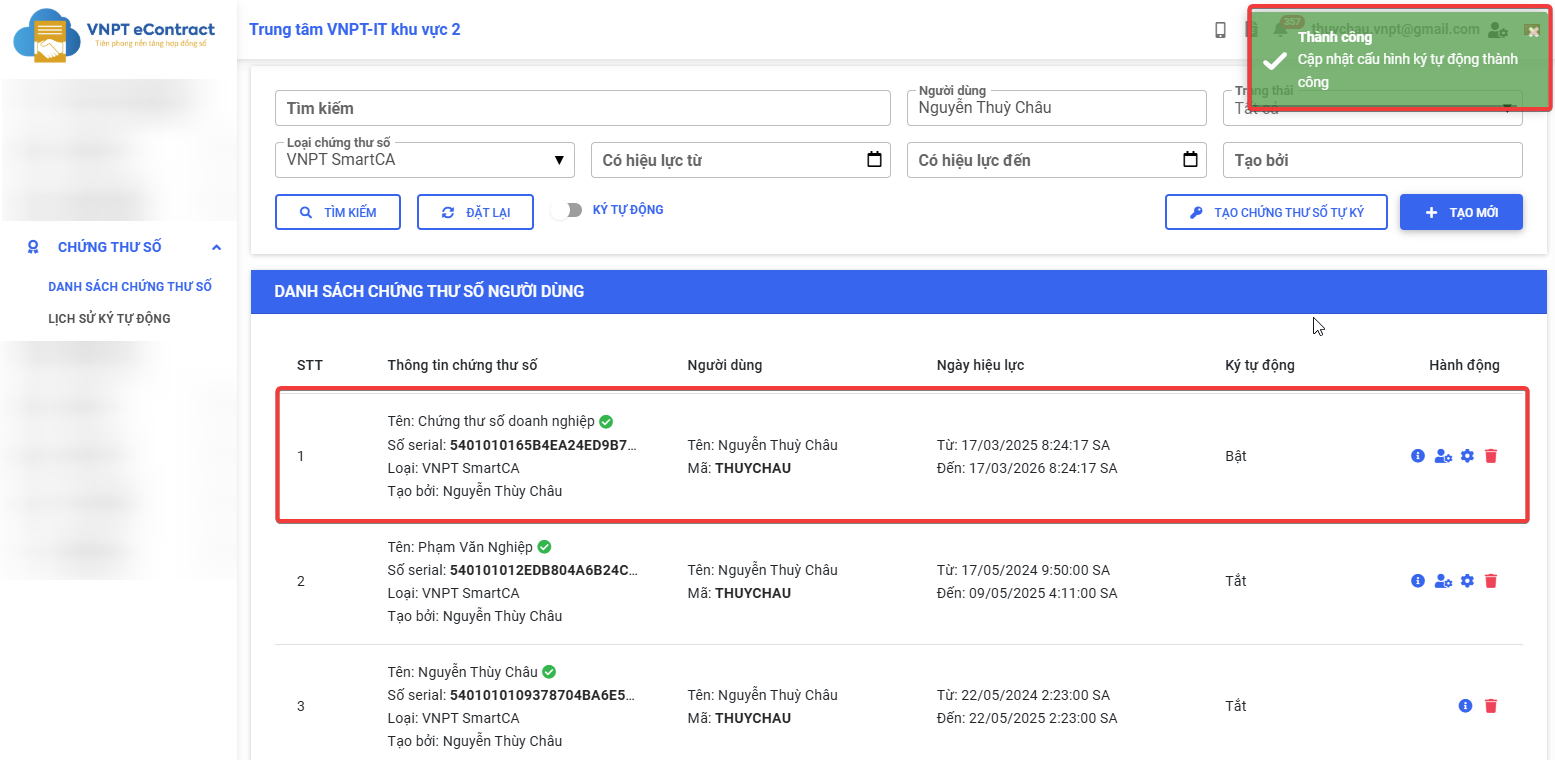
Step 5: Click “Save” to complete the process of enabling automatic signing configuration.

- To enable the auto-sign configuration, the VNPT Smart enterprise certificate must provide complete information about the Password and Secret key. Please check and update the certificate information, especially regarding the Signature image, Signature text, and Signature display mode in the View Details feature before enabling this configuration.
- If a user has multiple VNPT SmartCA enterprise certificates, please note that each certificate can be configured for auto-signature for multiple types of documents. However, each type of document can only be configured by a single certificate for the same user.
Instructions for disabling automatic signing configuration
-
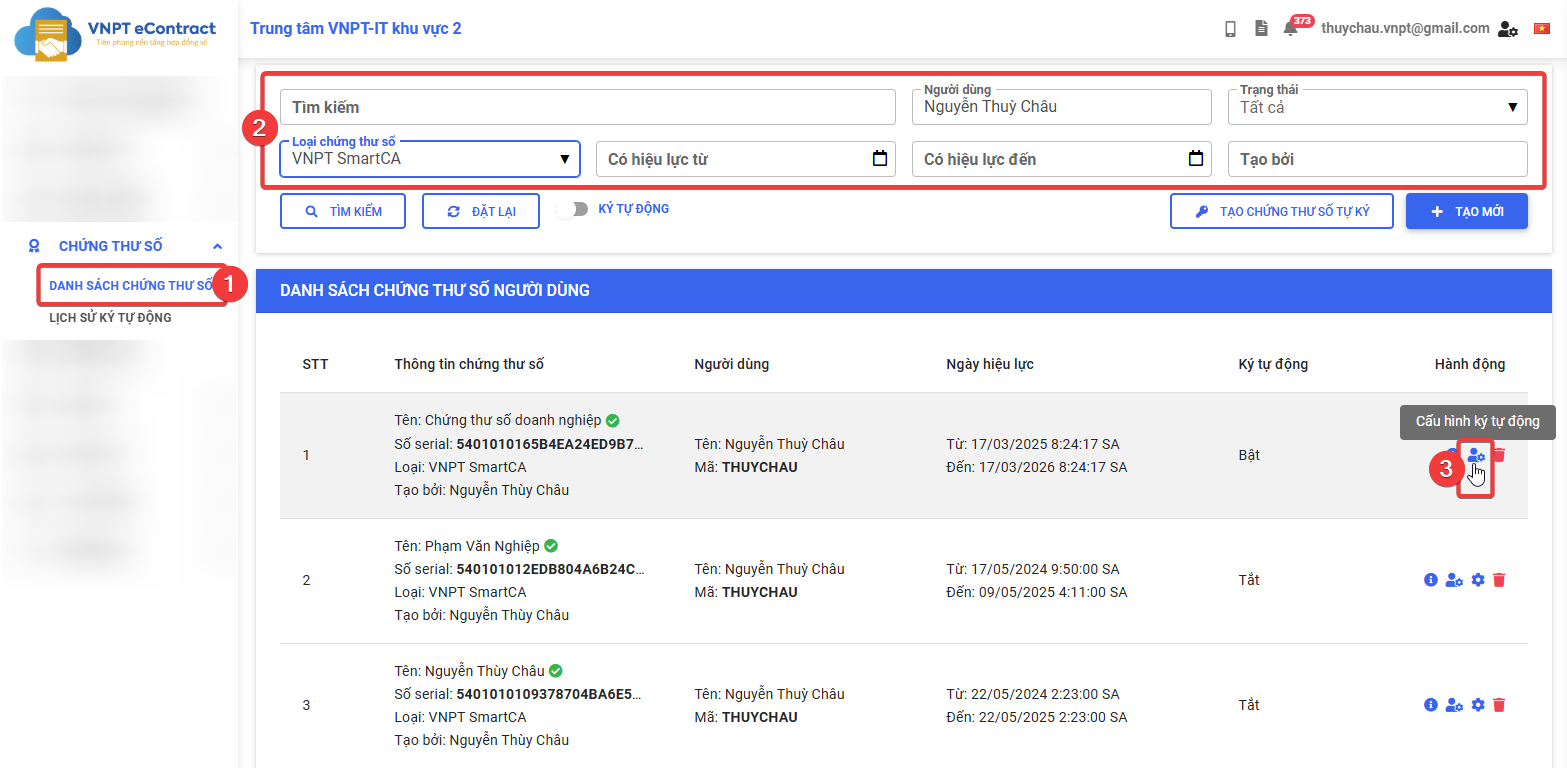
Step 1: Access the User certificate list screen.
-
Step 2: Select the digital certificate that has automatic signing enabled.
-
Step 3: Click “Config auto sign”.
-
Step 4: The automatic signing configuration window appears; in the "Enable/Disable auto sign" information, click to disable (change to gray).
-
Step 5: Click “Save” to complete the process of disabling automatic signing configuration.
When disabling automatic signing configuration, documents that have already been queued will continue to be processed and cannot be stopped. The system will not queue or process any new documents after this feature is disabled.